|

 | | | | | | | |
| | | |
| |

|
| OS X & Cocoa Writings by Andrew C. Stone ©1995-2003 Andrew C. Stone |

|
|
|
|
|
What A Drag!
Creating drag wells in Cocoa
©2002 Andrew C. Stone All Rights Reserved
The richness of the user interface in Macintosh OS X is due, in part, to the abundance of elements that allow dragging and dropping of data within and between applications. For example, Cocoa uses drag and drop for applying color swatches to text selections and objects. Stone Design's flagship application, Create™, makes heavy use of the drag and drop metaphor. A library of resources allows users to drag in components, pages, effects, blends, images, and patterns. The user can quickly save a selection of graphics to one of many image formats with Create's "Image Well". This article will cover the basics of creating a custom control which allows a user to drag in a file, and then allows the user to drag out the file. |
| | |
|
|
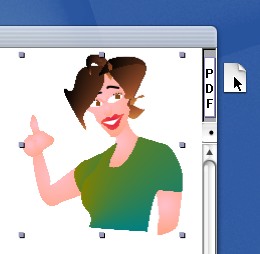
Create's image well lets you drag out data in various image formats.
First, a bit of article administrivia. Mac OS X has been a fast moving target with the various developer releases, Public Beta, and soon OS X GM (for Golden Master which always reminds me of that Eddy Murphy movie about G)! Because of the changes introduced with each release and the several month lag time between penning articles and when MacTech hits the stands, there are times when what I've written doesn't jive with the current reality. To address this, I've added a section to the Stone Design website for MacTech article updates and errata. So if you get confused, check out www.stone.com/dev/MacTech_Errata/ to see if there are updates, and if not, email me so I can post fixes.
It's actually quite simple to create new types of user interface controls using Cocoa because of the well designed hierarchy of classes that comprise the Application framework. Your first job is to find an existing class that your control can inherit from, which will reduce the amount of code that you have to write. I keep /Developer/Documentation/Cocoa/cocoa.html open so I can quickly navigate to the AppKit or Foundation API's. But an even easier way to look at the object hierarchy is to use InterfaceBuilder. First launch ProjectBuilder and create a new Cocoa Application project named ImageWellTester. Click on the "Resources" triangle in the Files and Groups outline view, and double-click the MainMenu.nib. This will launch InterfaceBuilder.
Click on the "Classes" tab of the document window, and then explore the NSObject outline view: |
|
| |

|
|
Interface Builder lets you explore the hierarchy of objects offered by Cocoa.
Our drag well is definitely a subclass of NSView, but we can gain further functionality by subclassing NSControl, which gives us the target/action support. Select NSControl in the Classes pane. If you hold down the CONTROL key while clicking on NSControl, a context-sensitive menu appears. Do this and select "Subclass". A new class which inherits from NSControl is created and named, by default, MyControl. Rename the class to DragWell.
Why write code if you can have it written for you? You can use InterfaceBuilder to produce stub files where all you have to do is fill in the functionality in the stubbed out methods. Click on the "outlet" icon to add instance variables to the class, and the "+" icon to add actions to the class. For now, we don't have any to add. Be sure DragWell is selected, and choose select "Create Files..." from the Classes menu (or again using the context menu via CONTROL key). They will be named DragWell.m and DragWell.h - leave the "Insert into Project Builder" selected and click OK.
Drag out a "Custom View" from the IB palette window, second tab, onto to the main window. Choose Tools->Inspector->Custom Class popup button, and click on "DragWell". The custom view should now say "DragWell". Save the file.
Go back to ProjectBuilder, select the newly added DragWell.h and DragWell.m and you'll see the stub:
#import <Cocoa/Cocoa.h>
@interface DragWell : NSControl
{
}
@end
...
#import "DragWell.h"
@implementation DragWell
@end
Every custom view must define its own drawing method, drawRect:, where the actual drawing of the view takes place. We'll want a simple, depressed bezeled look, with an icon to drag in the center. And our control will adhere to two protocols - NSDraggingDestination and NSDraggingSource, to allow both dragging out of info and accepting dragged in info. A complete list of the methods required by the protocols are found in:
/System/Library/Frameworks/AppKit.framework/Headers/NSDragging.h
Here's the 'well' commented code for the DragWell - type it in (or download it from www.stone.com/dev/MacTech/Jan-2001/). You can copy and paste it as a template for use in other objects, modifying where needed to copy other data types to the drag pasteboard as needed.
+++++++++++ DragWell.h ++++++++++++++++
#import <Cocoa/Cocoa.h>
@interface DragWell : NSControl
{
NSImage *image; // the image displayed and dragged by the user
NSString *file; // the file path that the user will drag out
unsigned int last; // for optimizing the draggingUpdated: method
}
// if you want to programmatically set a file in the well:
- (void)setFile:(NSString *)newFile;
@end
+++++++++++ DragWell.m ++++++++++++++++
#import "DragWell.h"
/* Example source by Andrew Stone andrew@stone.com www.stone.com for MacTech */
@implementation DragWell
// when our DragWell is reconstituted from the nib file, awakeFromNib gets called
- (void) awakeFromNib
{
// this is where you register for various types of drag pasteboards:
[self registerForDraggedTypes:[NSArray arrayWithObject:NSFilenamesPboardType]];
}
// Never add an ivar which allocates memory without releasing it in dealloc:
// Don't Litter!
- (void)dealloc {
[file release];
[image release];
[super dealloc];
}
// Every custom view must implement drawRect:
// We'll draw our depressed bezeled rect
// and if there is a file, we'll draw an image for dragging out
- (void)drawRect:(NSRect)rects
{
// one simple call draws the depressed bezel:
NSDrawGrayBezel([self bounds] , [self bounds]);
// if you like the pinstripes, then include these two lines:
[[NSColor windowBackgroundColor] set];
NSRectFill(NSInsetRect([self bounds],3.0,3.0));
// find the center of the view and draw the image over:
if (image != nil) {
NSPoint p;
NSSize sz = [image size];
p.x = ([self bounds].size.width - sz.width)/2.;
p.y = ([self bounds].size.height - sz.height)/2.;
[image compositeToPoint:p operation:NSCompositeSourceOver];
}
}
// When we set the file, we also set the image which we get from the NSWorkspace:
- (void)setFile:(NSString *)newFile {
// it's good practice to not do any work if nothing would change:
if (![newFile isEqualToString:file]) {
// live clean and let your works be seen:
[file release];
[image release];
// copy the newFile into our instance variable file:
file = [newFile copyWithZone:[self zone]];
// check if the file is nil or empty string:
if (!file || [file isEqualToString:@""]) {
image = nil;
} else {
// we have a file, now let's find the image for that file:
image = [[[NSWorkspace sharedWorkspace] iconForFile:file]retain];
}
// we'll need to redraw next event
// this is the approved Cocoa way of setting ourselves "dirty"
[self setNeedsDisplayInRect:[self bounds]];
}
}
// here we copy the filename to the pasteboard
// I like to factor this out because it may vary from object to object:
- (BOOL)copyDataTo:pboard
{
if (file != nil && ![file isEqualToString:@""]) {
[pboard declareTypes:[NSArray arrayWithObject:NSFilenamesPboardType] owner:self];
[pboard setPropertyList:[NSArray arrayWithObject:file] forType:NSFilenamesPboardType];
return YES;
} else return NO;
}
// DRAGGING SOURCE PROTOCOL METHODS
// To add drag away functionality to a control, implement these:
// draggingSourceOperationMaskForLocal lets you control the behavior of what should
// happen with the data on the pasteboard: copy, link or any
// the isLocal flag tells you whether the object querying is from within your app
// or from another application running on the system
- (unsigned int)draggingSourceOperationMaskForLocal:(BOOL)isLocal
{
if (isLocal) return NSDragOperationCopy;
return NSDragOperationCopy|NSDragOperationGeneric|NSDragOperationLink;
}
// The simple dragImage:at:offset:event:pasteboard:source:slideback: method
// is all we do to initiate and run the actual drag sequence
// But we only do this if we have an image and we successfully write our data
// to the pasteboard in copyDataTo: method
- (void)mouseDown:(NSEvent *)e
{
NSPoint location;
NSSize size;
NSPasteboard *pb = [NSPasteboard pasteboardWithName:(NSString *) NSDragPboard];
if (image && [self copyDataTo:pb]) {
size = [image size];
location.x = ([self bounds].size.width - size.width)/2;
location.y = ([self bounds].size.height - size.height)/2;
[self dragImage:image at:location offset:NSZeroSize event:(NSEvent *)e pasteboard:pb source:self slideBack:YES];
}
}
// DRAGGING DESTINATION PROTOCOL METHODS
// To add drag acceptance functionality to a control, implement these methods:
// this is called when the drag enters our view
// by returning NSDragOperationCopy
- (unsigned int) draggingEntered:sender
{
NSPasteboard *pboard;
last = NSDragOperationNone;
pboard = [sender draggingPasteboard];
// we don't acept drags if we are the provider!!
if ([sender draggingSource] == self) return NSDragOperationNone;
if ([[pboard types] containsObject:NSFilenamesPboardType]) {
if (image == nil) {
image = [[[NSWorkspace sharedWorkspace] iconForFile:[[pboard propertyListForType:NSFilenamesPboardType]objectAtIndex:0]]retain];
[self setNeedsDisplayInRect:[self bounds]];
}
// we'll copy or link depending on the intent of the dragging source:
last = [sender draggingSourceOperationMask];
}
return last;
}
// instead of constantly rechecking the pasteboard as the mouse moves inside the view
// we'll simply return the cached value that we set in 'last' in draggingEntered:
- (unsigned int) draggingUpdated:sender
{
return last;
}
// Because we're providing feedback by setting the file right when the user enters
// we'll need to undo that work if the user does not let go of the drag inside and exits instead:
- (void) draggingExited:sender
{
// the user has exited -> clean up:
if ([sender draggingSource] != self) {
if (file == nil) {
// then unset the file image we set in mouseEntered as feedback...
[image release];
image = nil;
[self setNeedsDisplayInRect:[self bounds]];
}
last = NSDragOperationNone;
}
}
// any dragging clean up might be done here
// don't forget to return YES!
- (BOOL) prepareForDragOperation:sender
{
return YES;
}
// Actually do the work in this method if it's not too time consuming
// Otherwise, you may consider returning YES, and doing the work
// in concludeDragOperation to prevent the drag from sliding back
// because it "timed out"
- (BOOL) performDragOperation:(id <NSDraggingInfo>)sender
{
NSPasteboard *pboard;
pboard = [sender draggingPasteboard];
[self setFile:[[pboard propertyListForType:NSFilenamesPboardType]objectAtIndex:0]];
return YES;
}
- (void)concludeDragOperation:(id <NSDraggingInfo>)sender
{
// we already did the work in draggingEntered
// You might notify some other object that the file is here
}
// this is good if you want to be able to drag out data even if the window is not
// front most, the first click will do more than just bring the window to front -
// It will also allow the drag to begin on that first mouse down
- (BOOL)acceptsFirstMouse:(NSEvent *)theEvent {
return YES;
}
@end
Conclusion
Adding drag and drop support to controls and views is very easy in Cocoa. Because ease of use and intuitive behavior is the keystone of Mac OS X, be sure to make your applications conform to this model.
Andrew Stone washes windows at Stone Design Corp <http://www.stone.com/> and divides his time between writing applications for Mac OS X and raising farm animals, including children.
|
|